
Our friends at Losant wanted to share how they built an actual 'error-alarm' using the Rollbar and Losant API's. Enjoy!
When I envision a tech company's smart office, I see tons of dashboards and indicator lights that monitor everything. Efficient monitoring is a critical piece of today's technology stack, and there are always ways to improve. Rollbar already does an impeccable job at alerting you when errors are thrown in your application. But, to increase awareness, accountability, and awesomeness in the office, we can connect Rollbar to our smart office. In this tutorial, we are going to build an office error alarm powered by Rollbar and Losant.

Building the Alarm
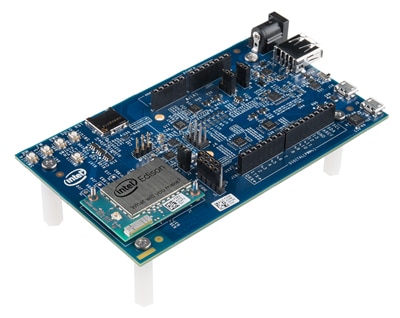
Intel Edison - This is a small compute module that we will use to control the devices in our office.
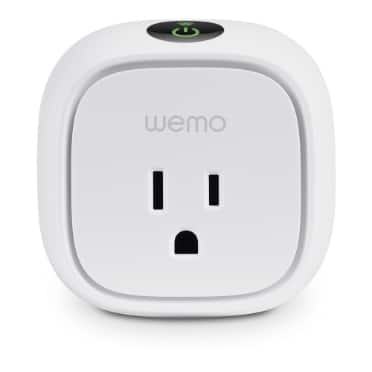
WeMo Insight Switch - This is a Wifi enabled, smart plug that we can control remotely.
**Rotating Police Party Light - This is a regular party light.

Setting up the Light
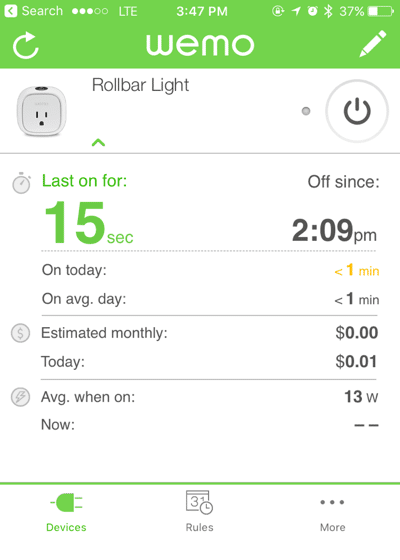
Connect the WeMo Insight Switch to your office network using the WeMo app and plug in the light. You should be able to control the light with the WeMo app.
Setting up Intel Edison
The WeMo switch exposes a local API. There is a Node.js module that wraps the API so we can control the WeMo switch.
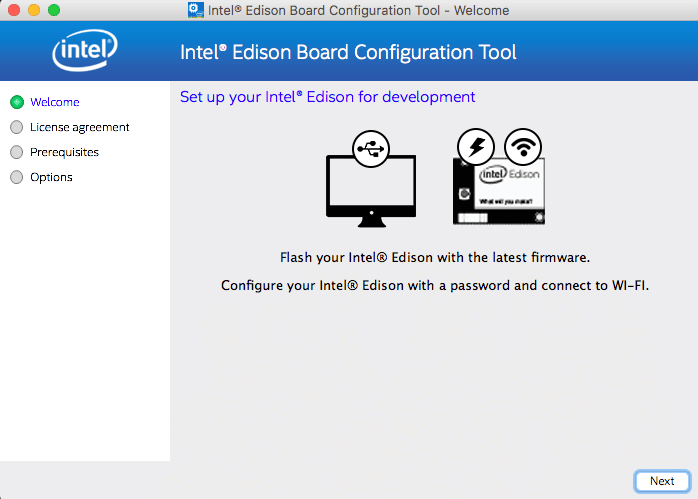
Since the API is local, the Intel Edison must be on the same network as the WeMo switch to connect to the device. Intel has a configuration tool we need to use to set up SSH and connect the Edison to Wifi.
Once the Edison is configured, using the credentials you just set, SSH into the device and download the source code for the alarm:
$ wget https://github.com/Losant/example-rollbar-alarm/archive/master.zip
$ unzip example-rollbar-alarm-master.zip
$ cd example-rollbar-alarm-master
$ npm install
Let's take a look at index.js:
'use strict'
const Wemo = require('wemo-client')
const Device = require('losant-mqtt').Device

const LOSANT_DEVICE_ID = 'DEVICE_ID'
const LOSANT_DEVICE_KEY = 'DEVICE_KEY'
const LOSANT_DEVICE_SECRET = 'DEVICE_SECRET'
const WEMO_DEVICE_URL = "http://192.168.86.135:49153/setup.xml"

let wemo = new Wemo()

/**
 * Construct Losant Device
 * @type {Device}
 */
let device = new Device({
    id: LOSANT_DEVICE_ID,
    key: LOSANT_DEVICE_KEY,
    secret: LOSANT_DEVICE_SECRET
})

/**
 * Connect to Losant
 */
device.connect()

wemo.load(WEMO_DEVICE_URL, (deviceInfo) => {
    console.log('Device Found: %s', deviceInfo.friendlyName)
    /**
     * Get the client for the found device
     * @type {Wemo Client}
     */
    var client = wemo.client(deviceInfo)

    /**
     * Listen for commands from Losant
     */
    console.log('Listening for Losant command...')
    device.on('command', function(command) {
        console.log('Command from Losant received: %s', command.name)

        if (command.name == 'rollbar-wemo-switch') {
            console.log("Setting State to : %s", command.payload.state )
            client.setBinaryState(command.payload.state)
        }
    })
})
In index.js , we are configuring our app to use a device in Losant. Then, load the WeMo device and listen for a command from Losant called rollbar-wemo-switch. The rollbar-wemo-switch command will include a parameter on the payload called state. state is a boolean. Lastly, state is passed into the client.setBinaryState function to turn the light on/off.
To connect to the WeMo device's API, we need to get its setup URL. In the code, it is represented as WEMO_DEVICE_URL. WeMo has a discover feature that we can use to find all of the devices on the network and retrieve their setup URL. There is another file in our source called find-devices.js we can run to do this for us:

After you find your device, update the WEMO_DEVICE_URL constant. It’s important to note: Because of DHCP, the IP of your WeMo device could change. It’s recommended to set a static IP address on the WeMo device using the DHCP reservation feature of your wireless router. You can also use the serial number of the device, like in this example.
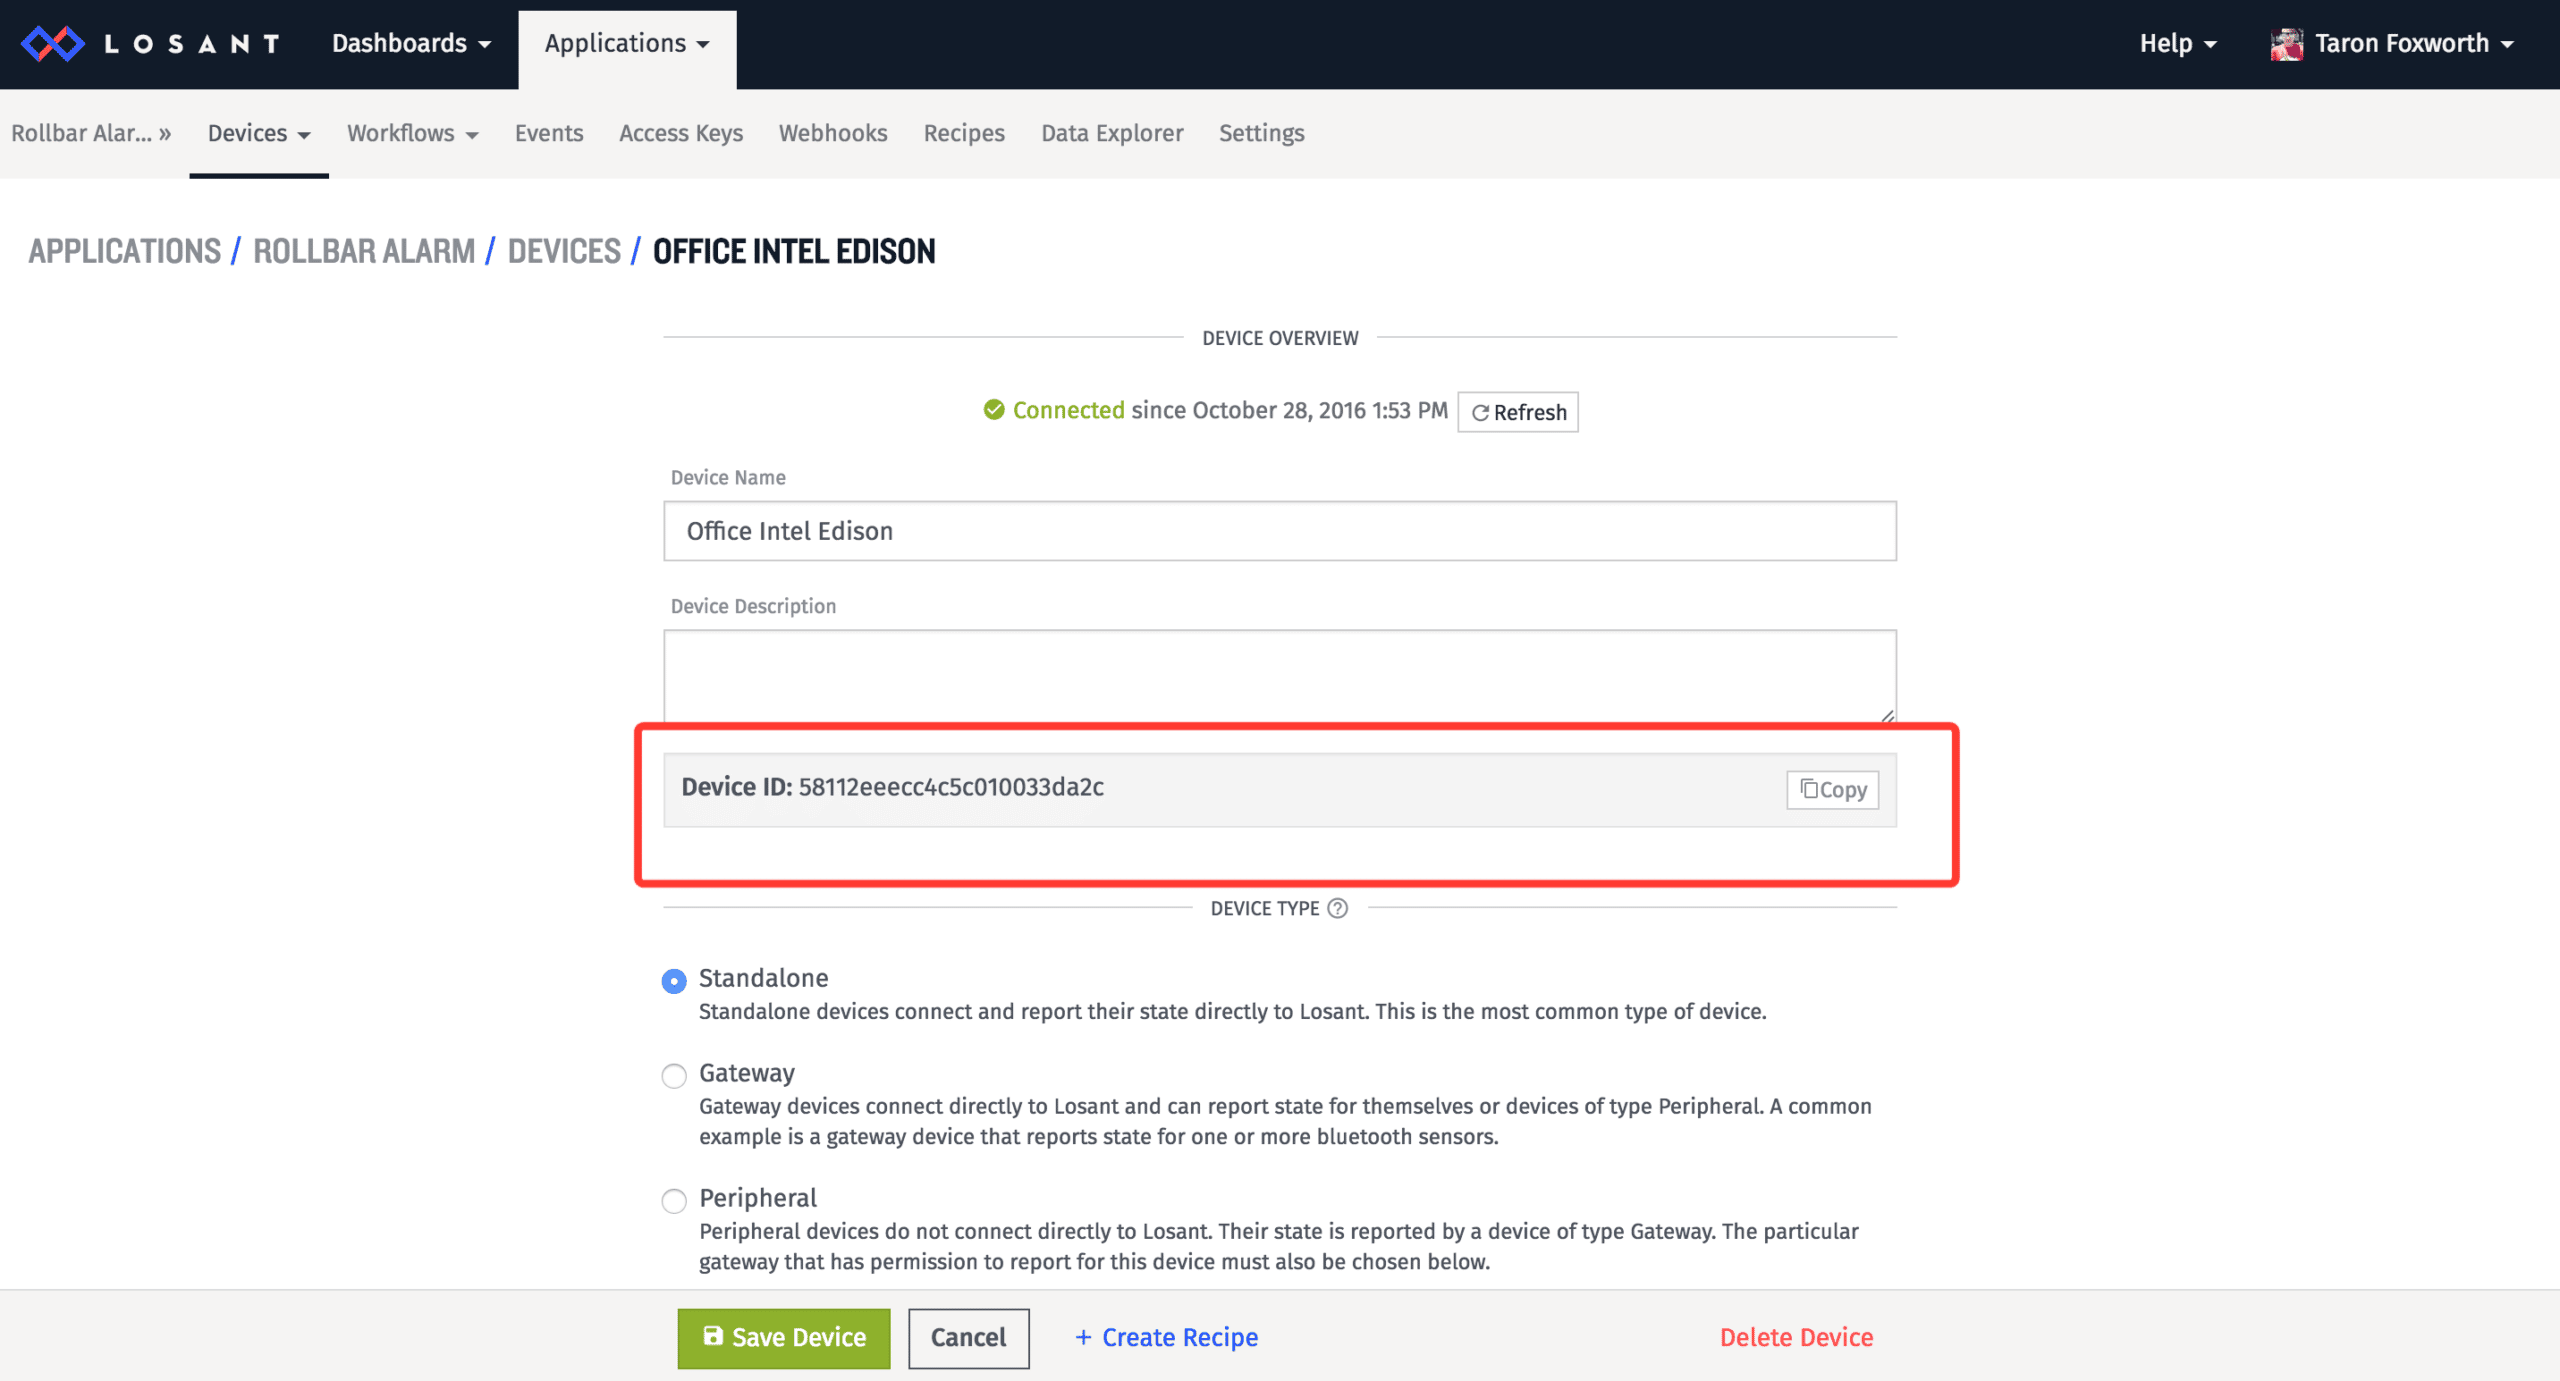
Before we can run index.js , we need to configure the constants: LOSANT_DEVICE_ID, LOSANT_DEVICE_KEY, and LOSANT_DEVICE_SECRET. We get these values from Losant.
Setting up Losant
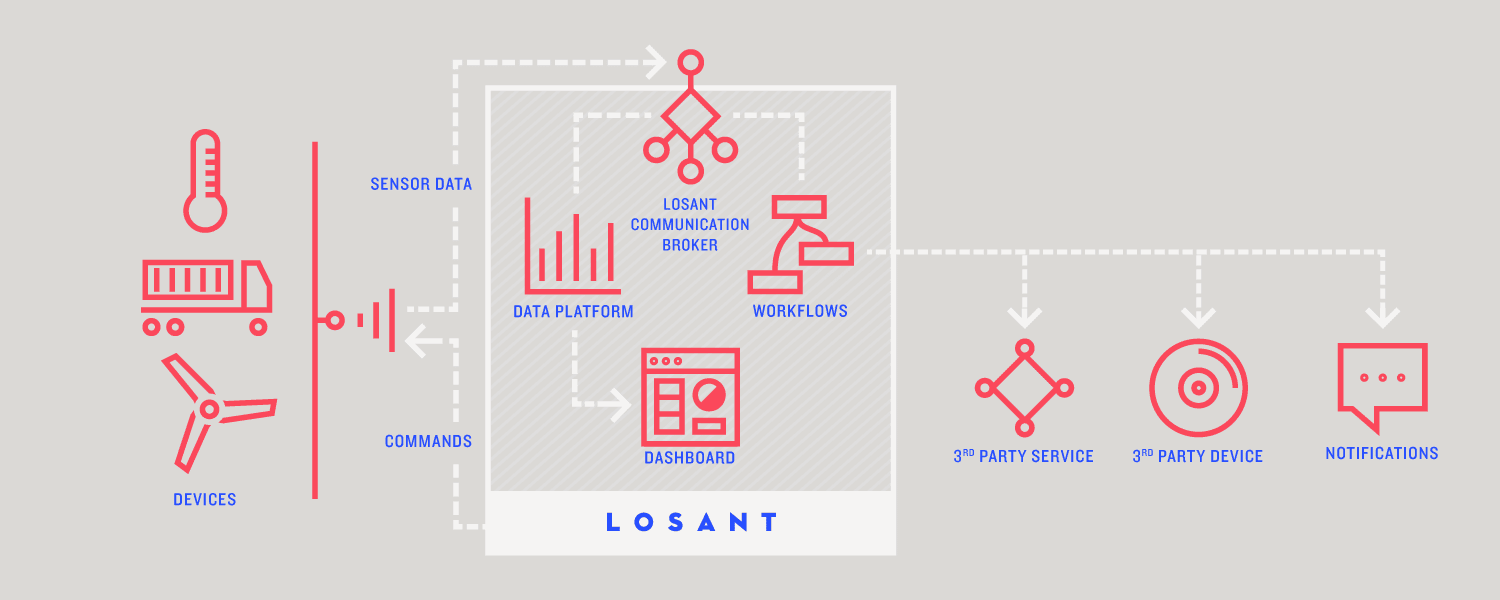
Losant makes it simple to interact with hardware. Using the Losant platform and SDK, we can collect data from devices and send commands back to devices.
First, create an account or log into Losant. Next, create an application for this project and create a device to obtain a device ID.
From the navigation menu in Losant, we can set up an access key/secret:
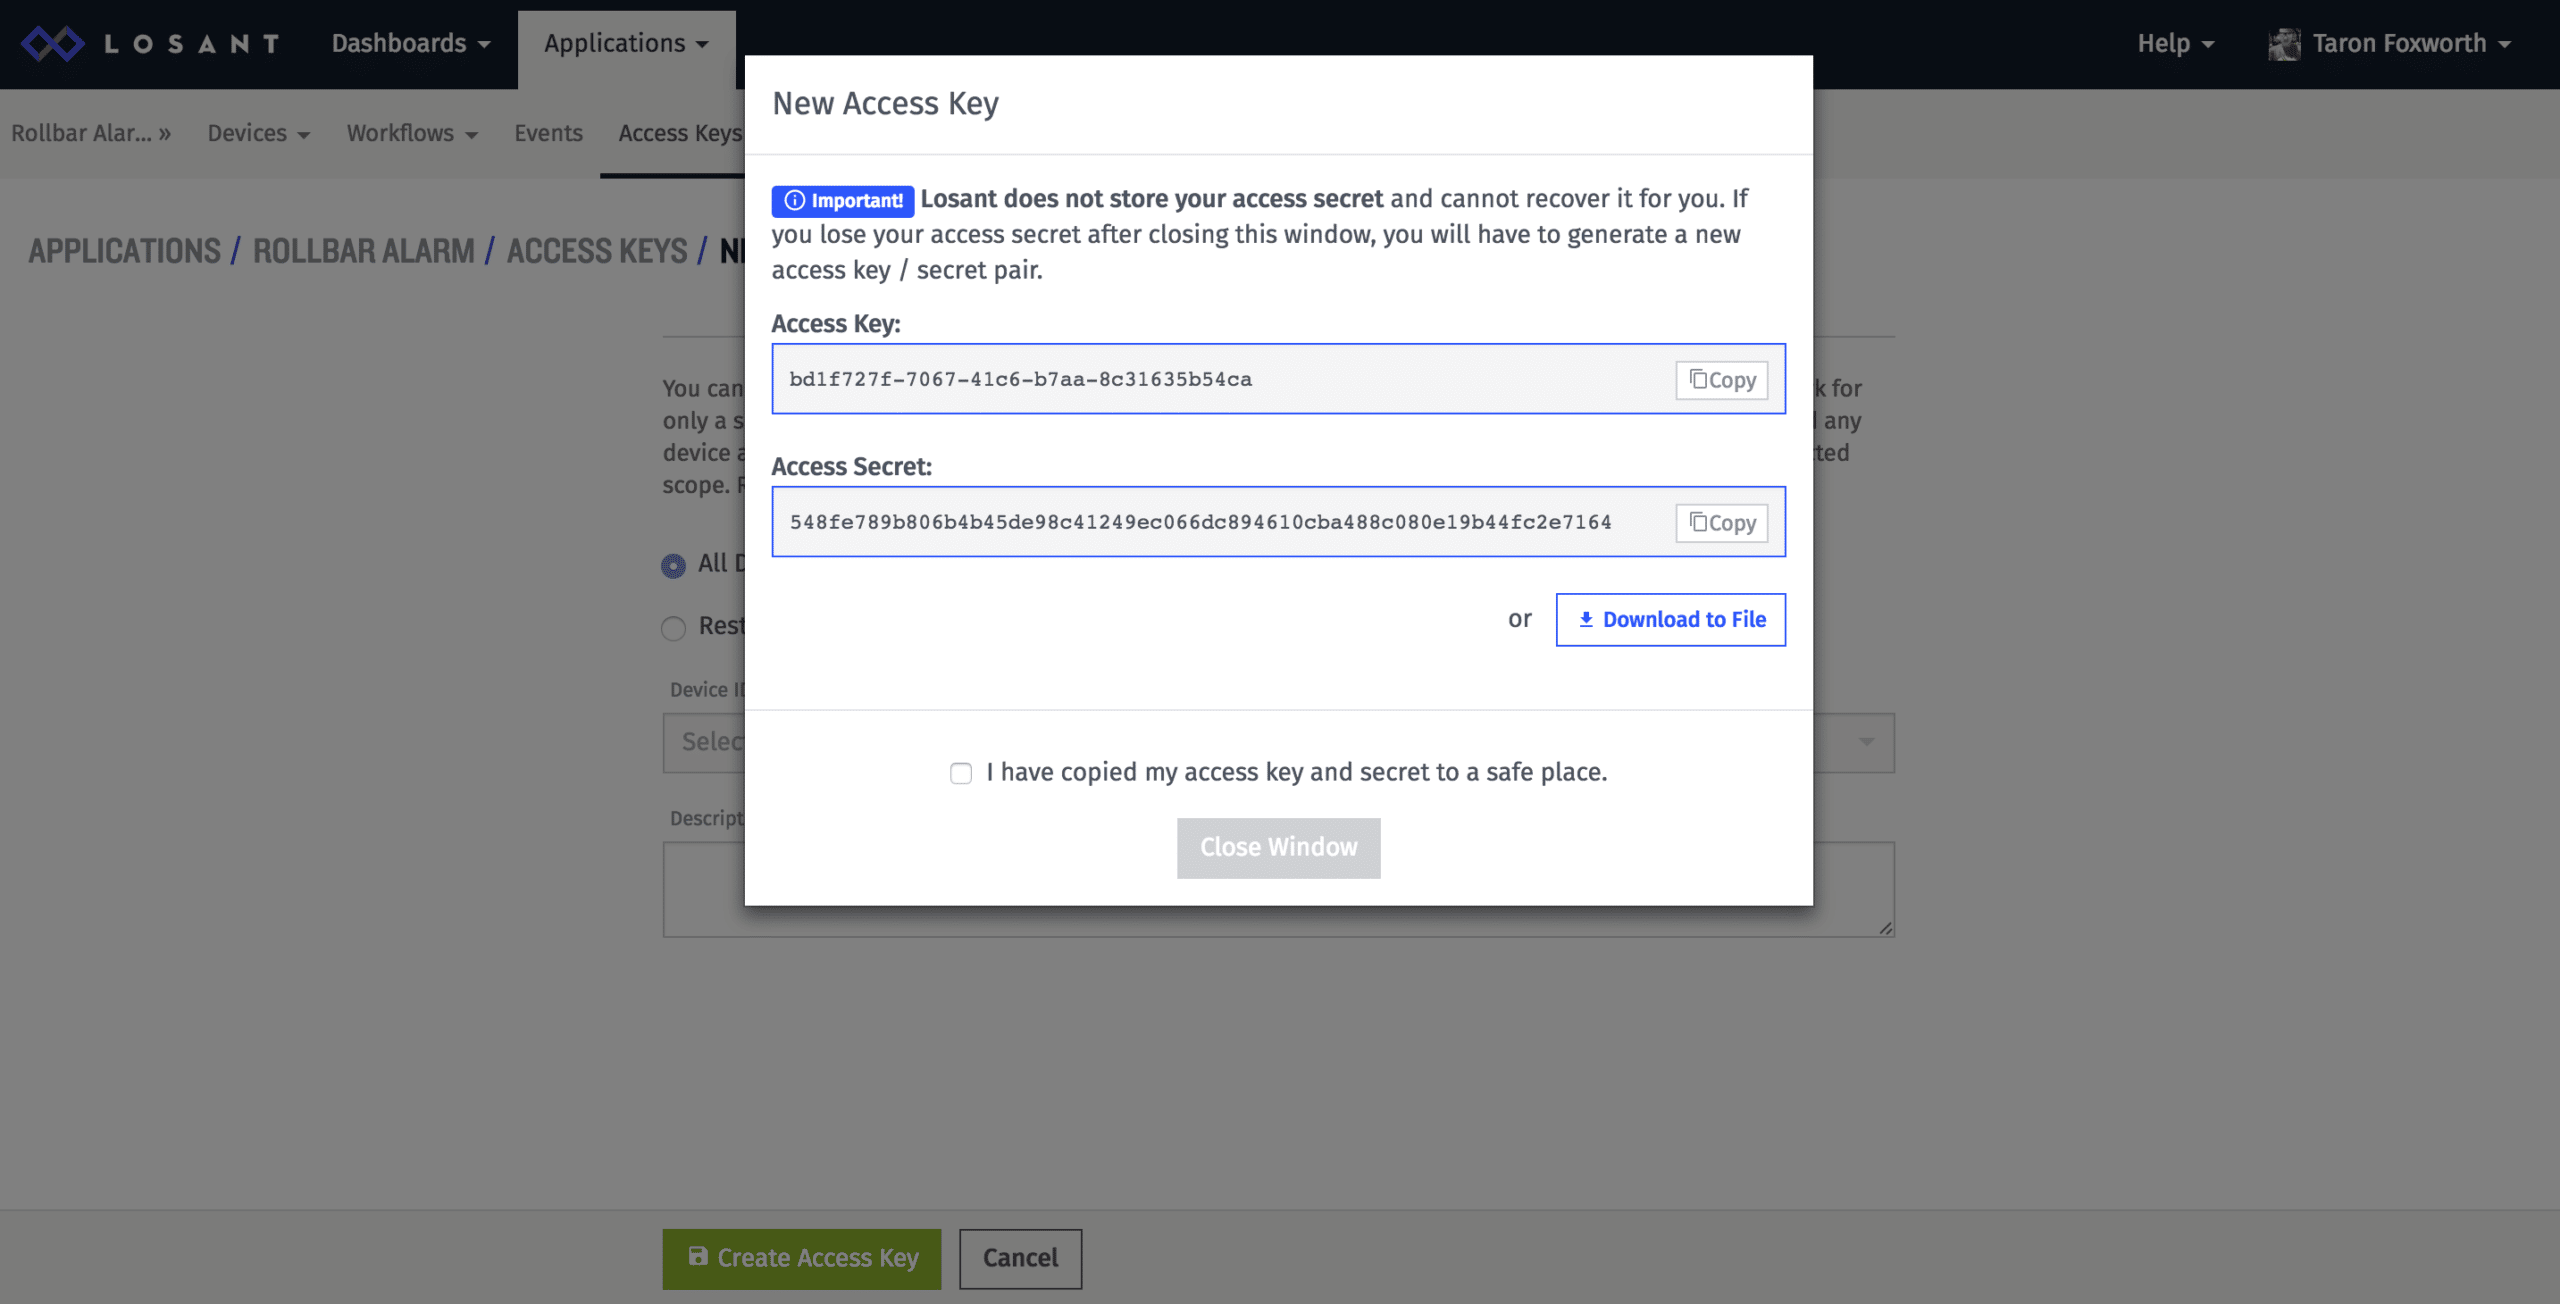
Now, you have a device ID, access key, and access secret. Be sure to update index.js with these values.
Connecting Rollbar and Losant
To connect Rollbar and Losant, we are going to use webhooks. Rollbar can send webhooks based on rules, such as the 10^nth occurrence of an error. In our use case, our CTO can define the rules for the alarm within Rollbar based on his specific, per-project, requirements.
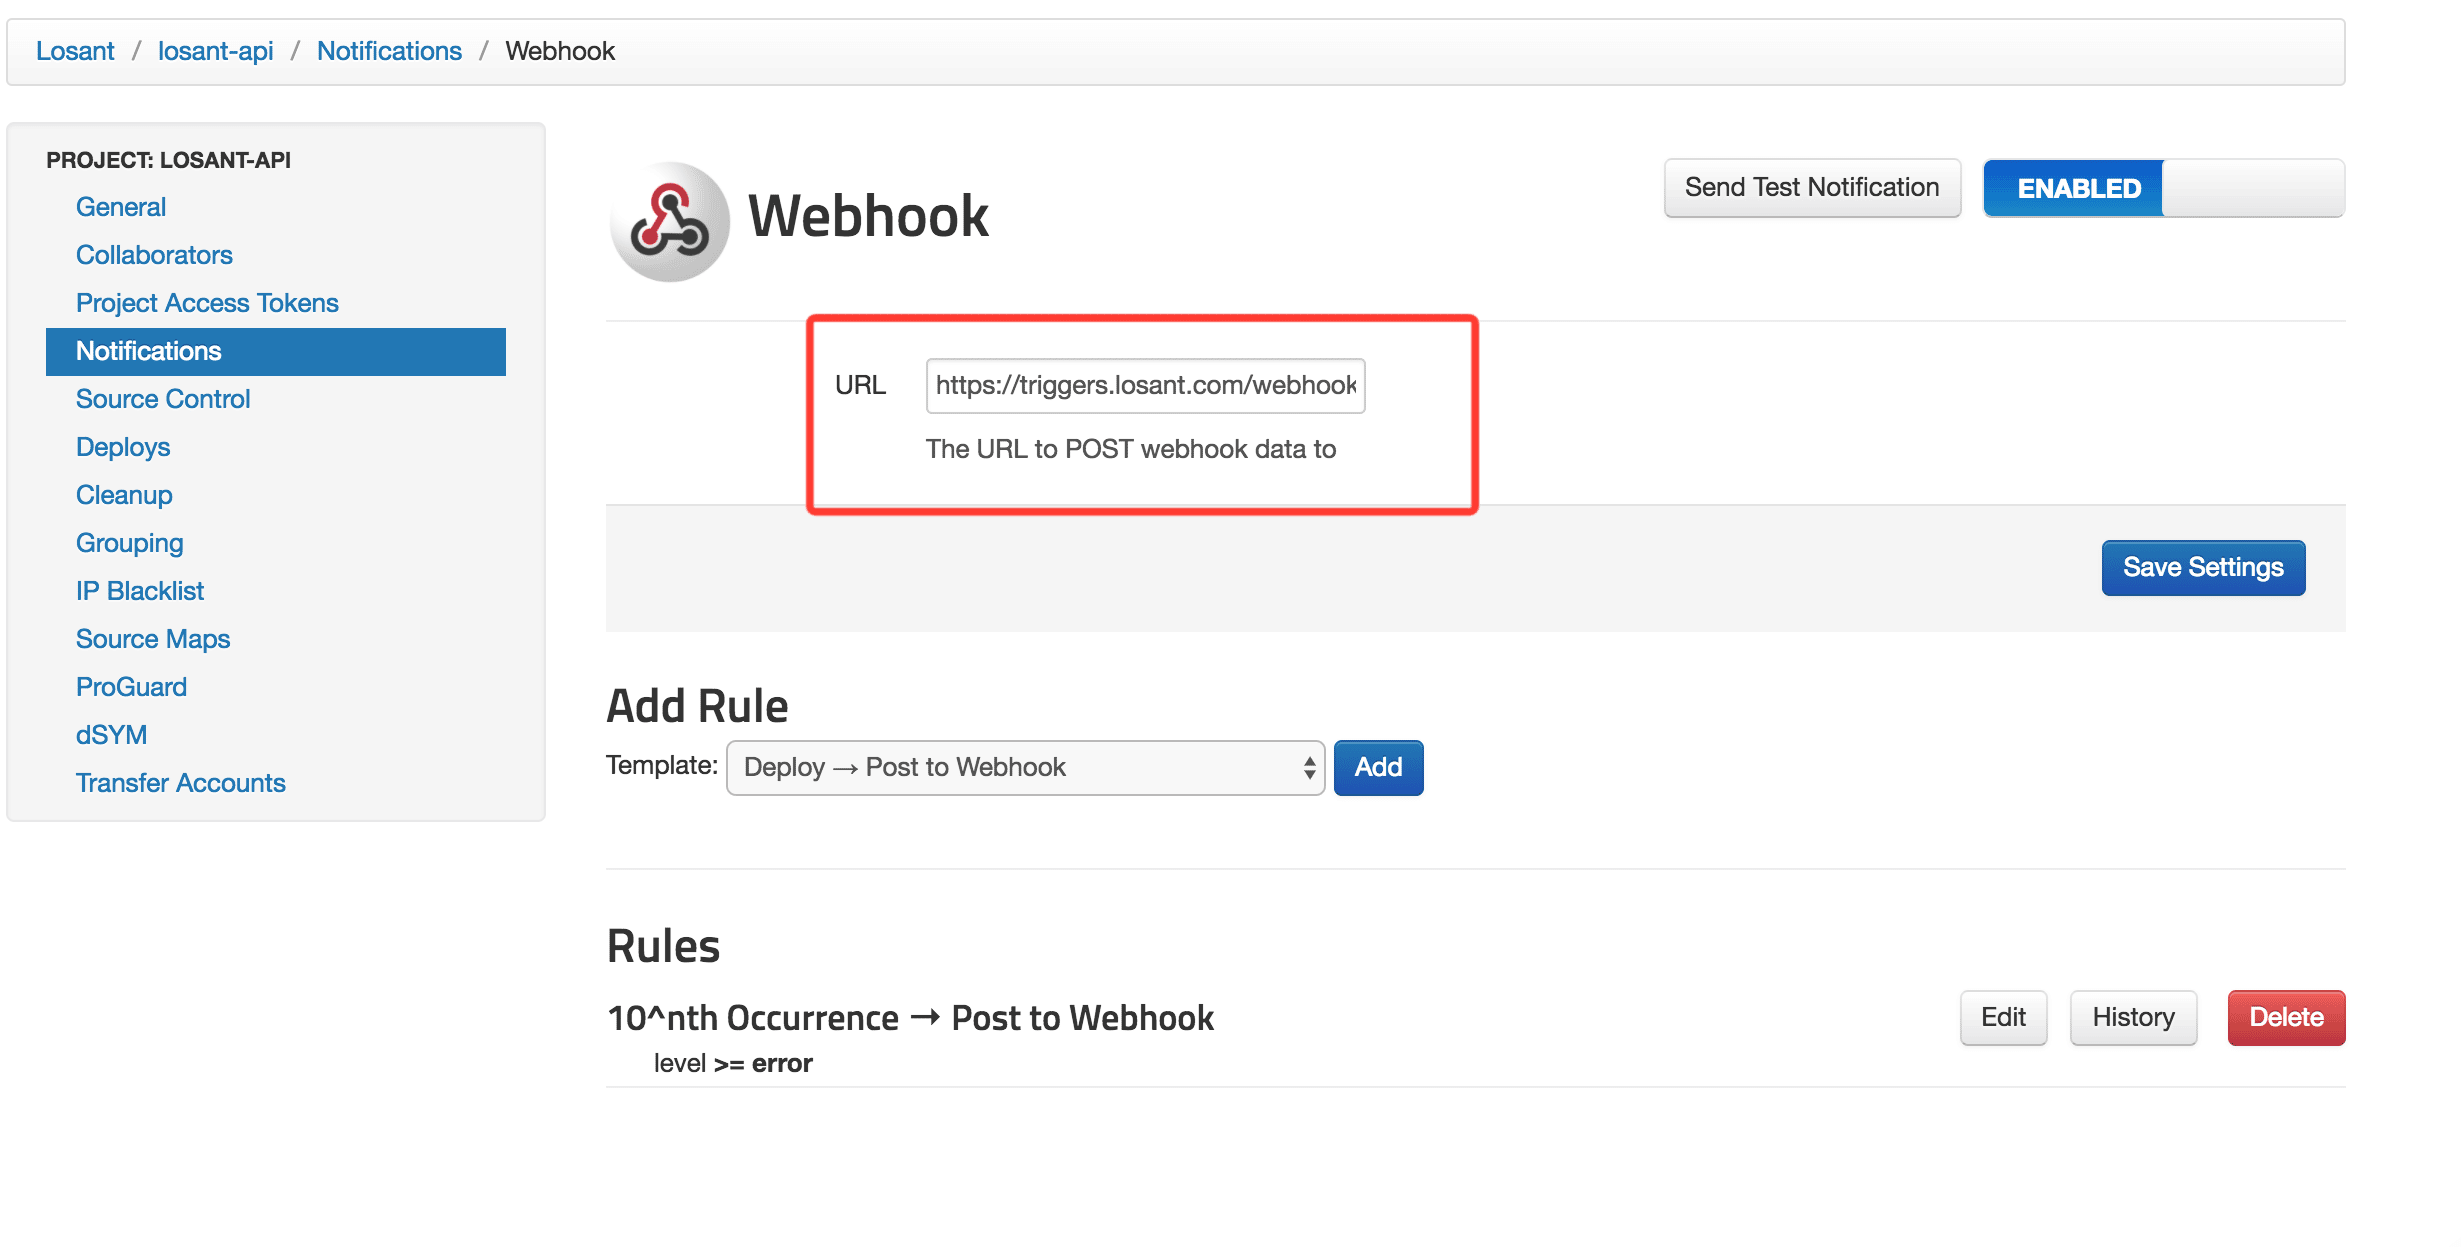
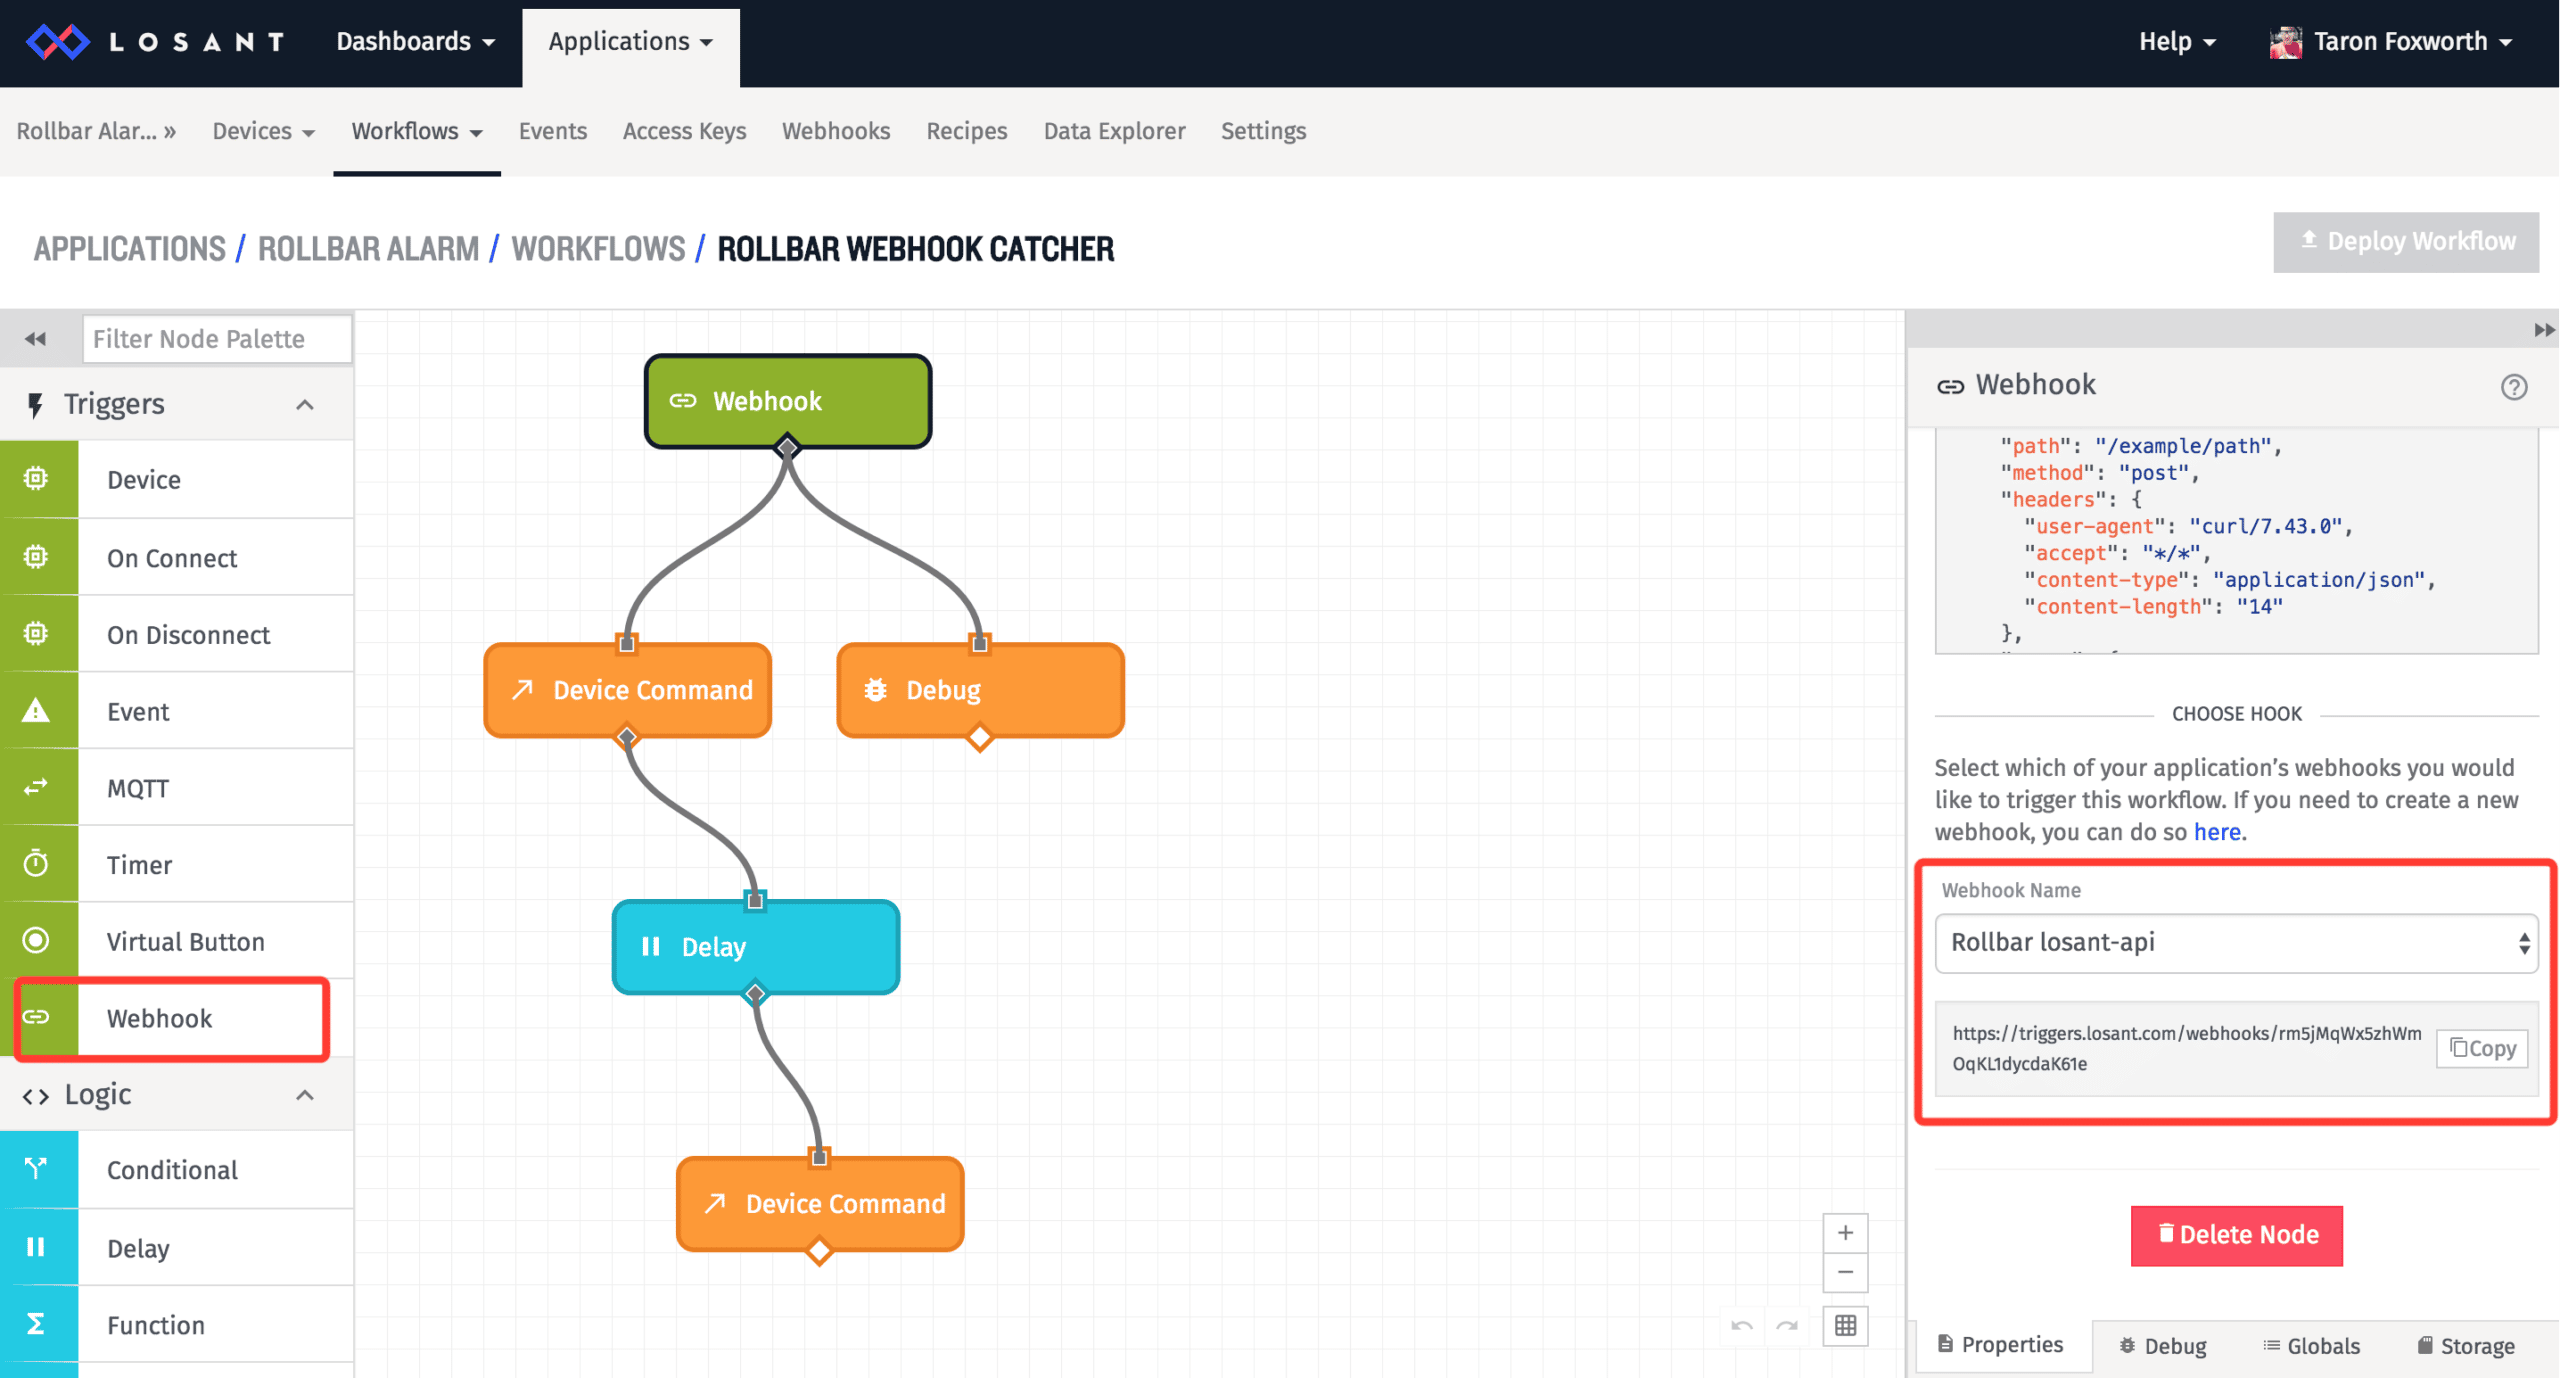
Create a webhook in Losant. Then, copy the webhook URL into Rollbar.

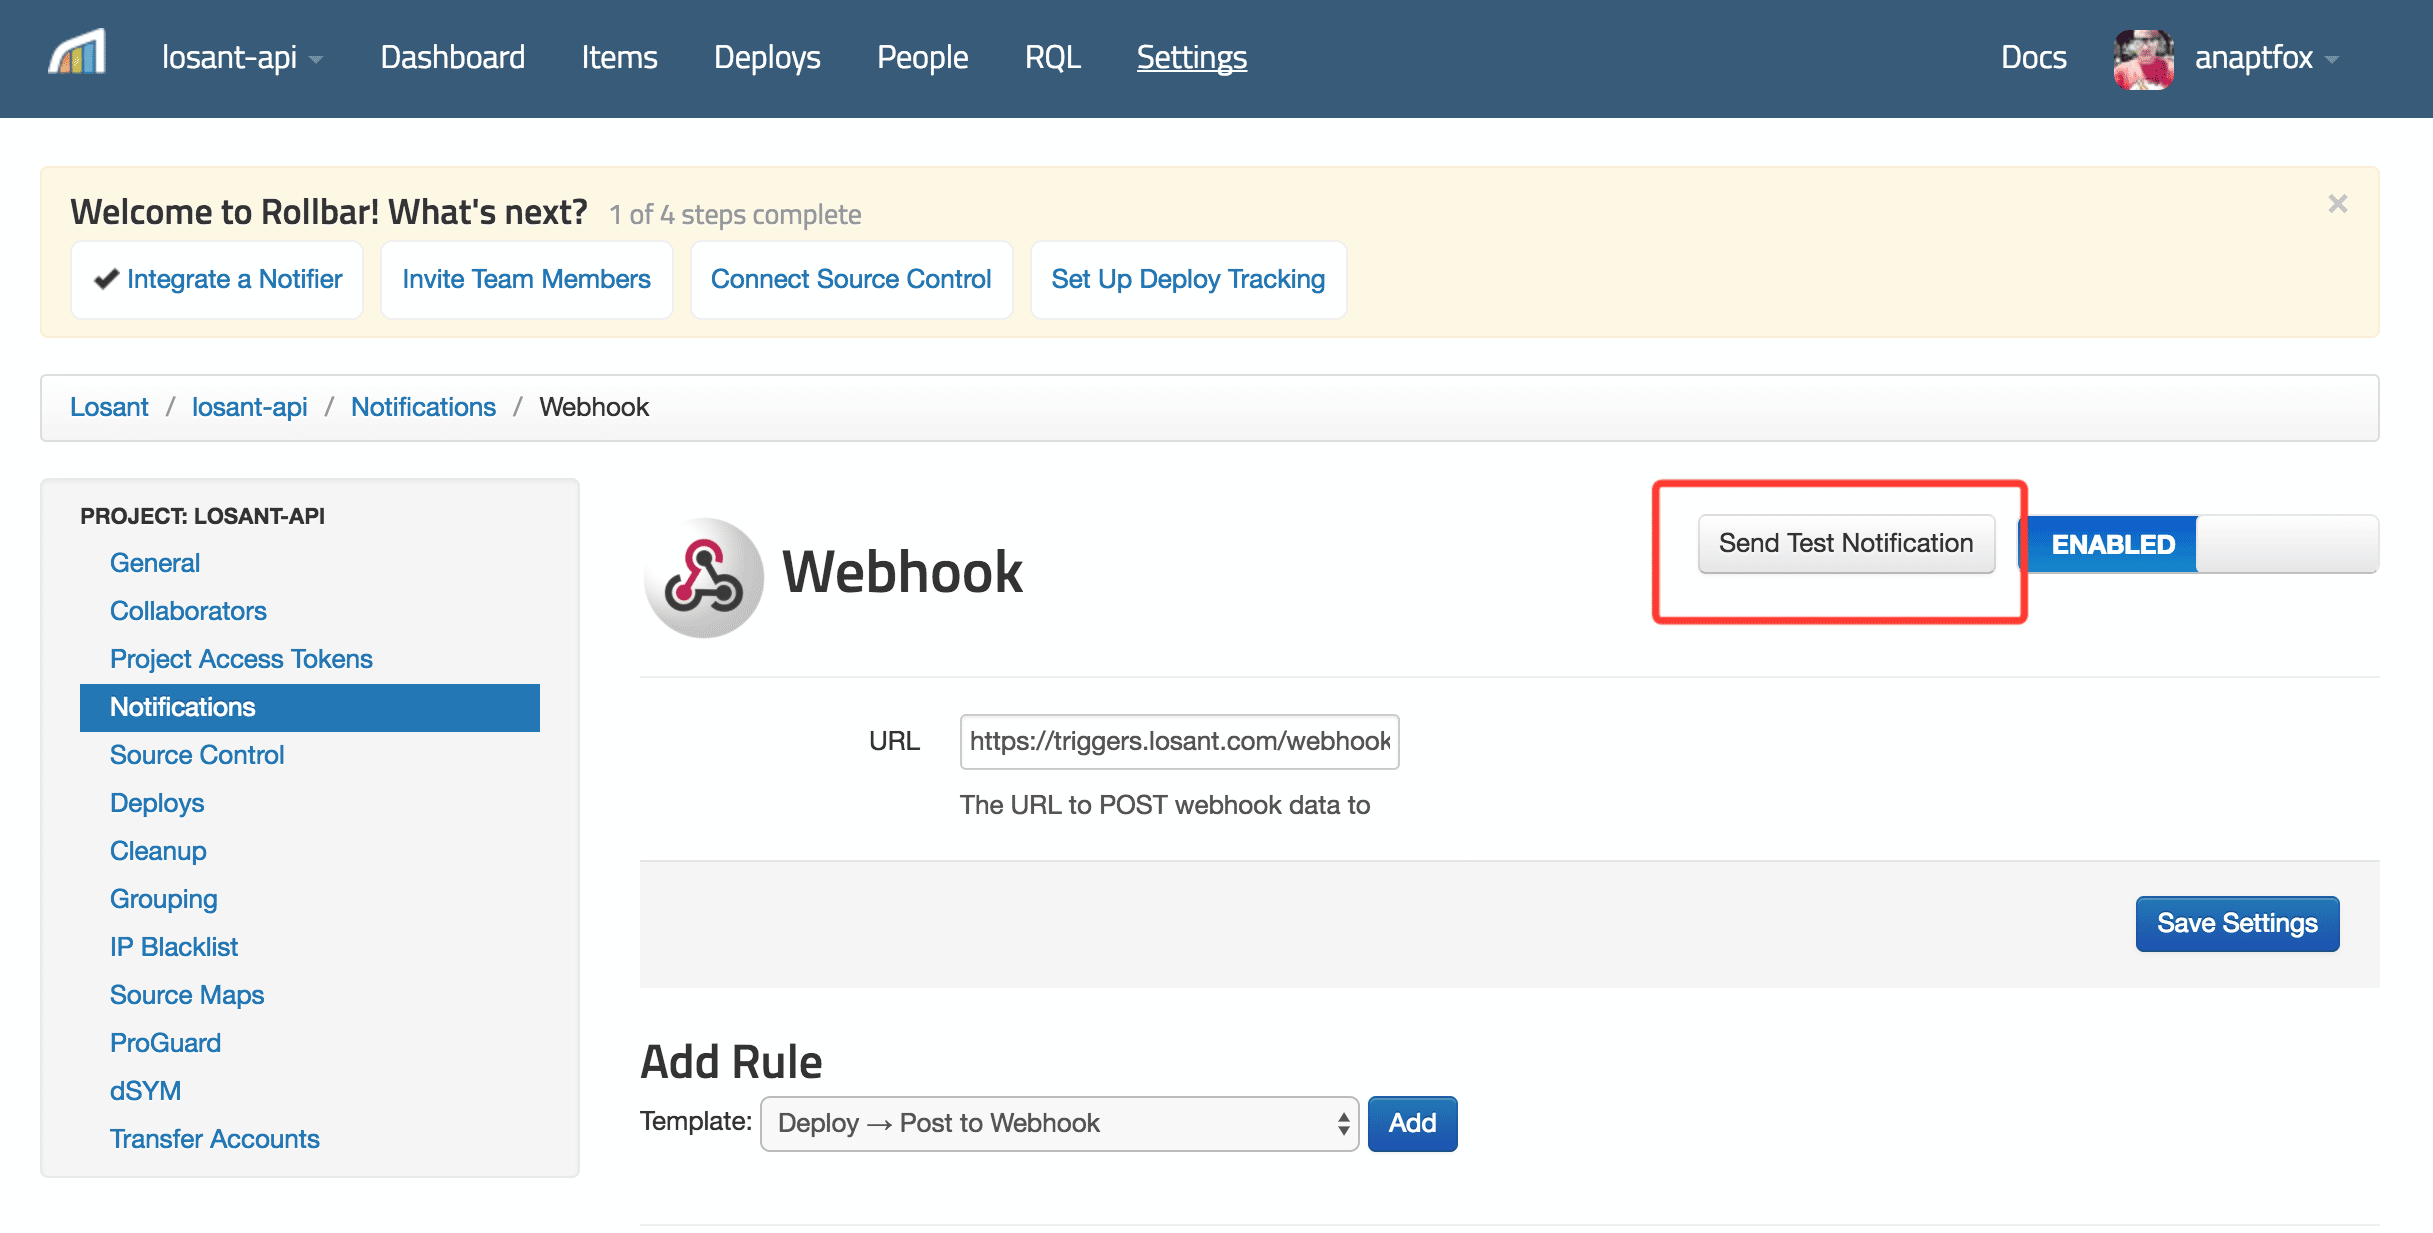
In Rollbar, webhooks are configured per-project. In the Rollbar dashboard, pick a project and go to Dashboard -> Settings -> Notifications -> Webhook. Paste the Losant webhook URL there, like so:
Building a Workflow
In Losant, workflows handle communication and logic between services and devices. All workflows start with a trigger, like a webhook. All workflows end with an output, like a device command. In between, Losant has tons of nodes that can accomplish tasks, like decisions based on logic or connect to other services like Twilio.
To start, Let’s create a workflow. Once created, we will start with the webhook node as our trigger. Each node has its configuration in the right panel of the dashboard. For the webhook node, we need to select the webhook we configured for Rollbar.
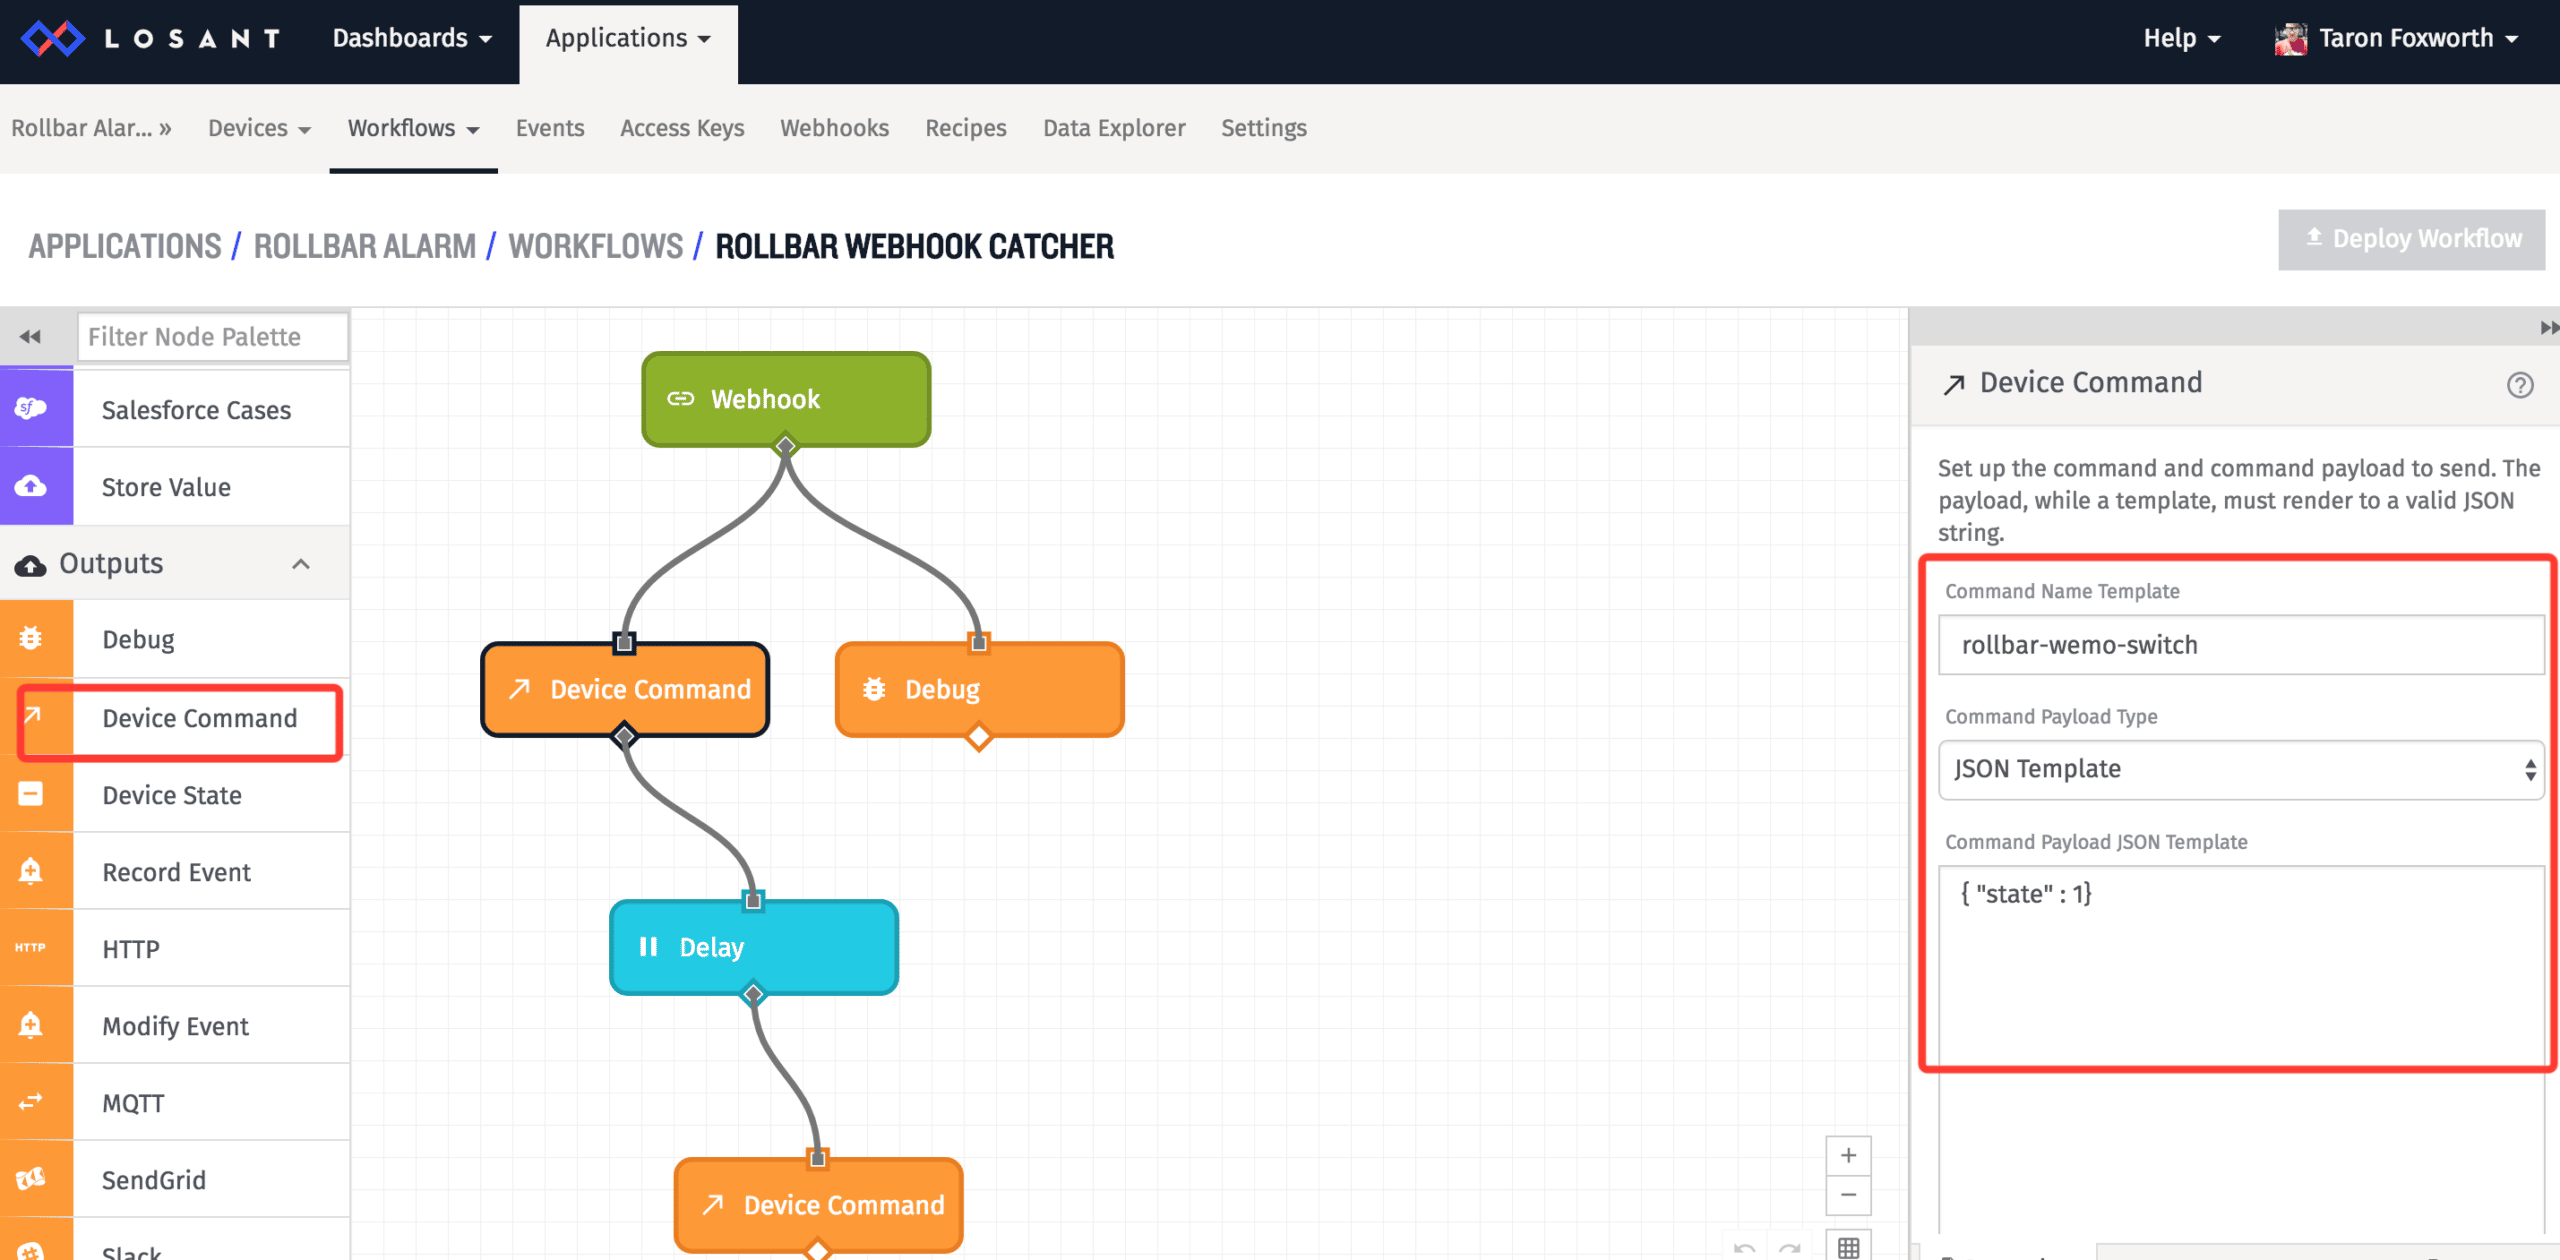
Once we have received the webhook trigger, we are going to send a rollbar-wemo-switch command to the device with a state of 1 to turn the alarm on.
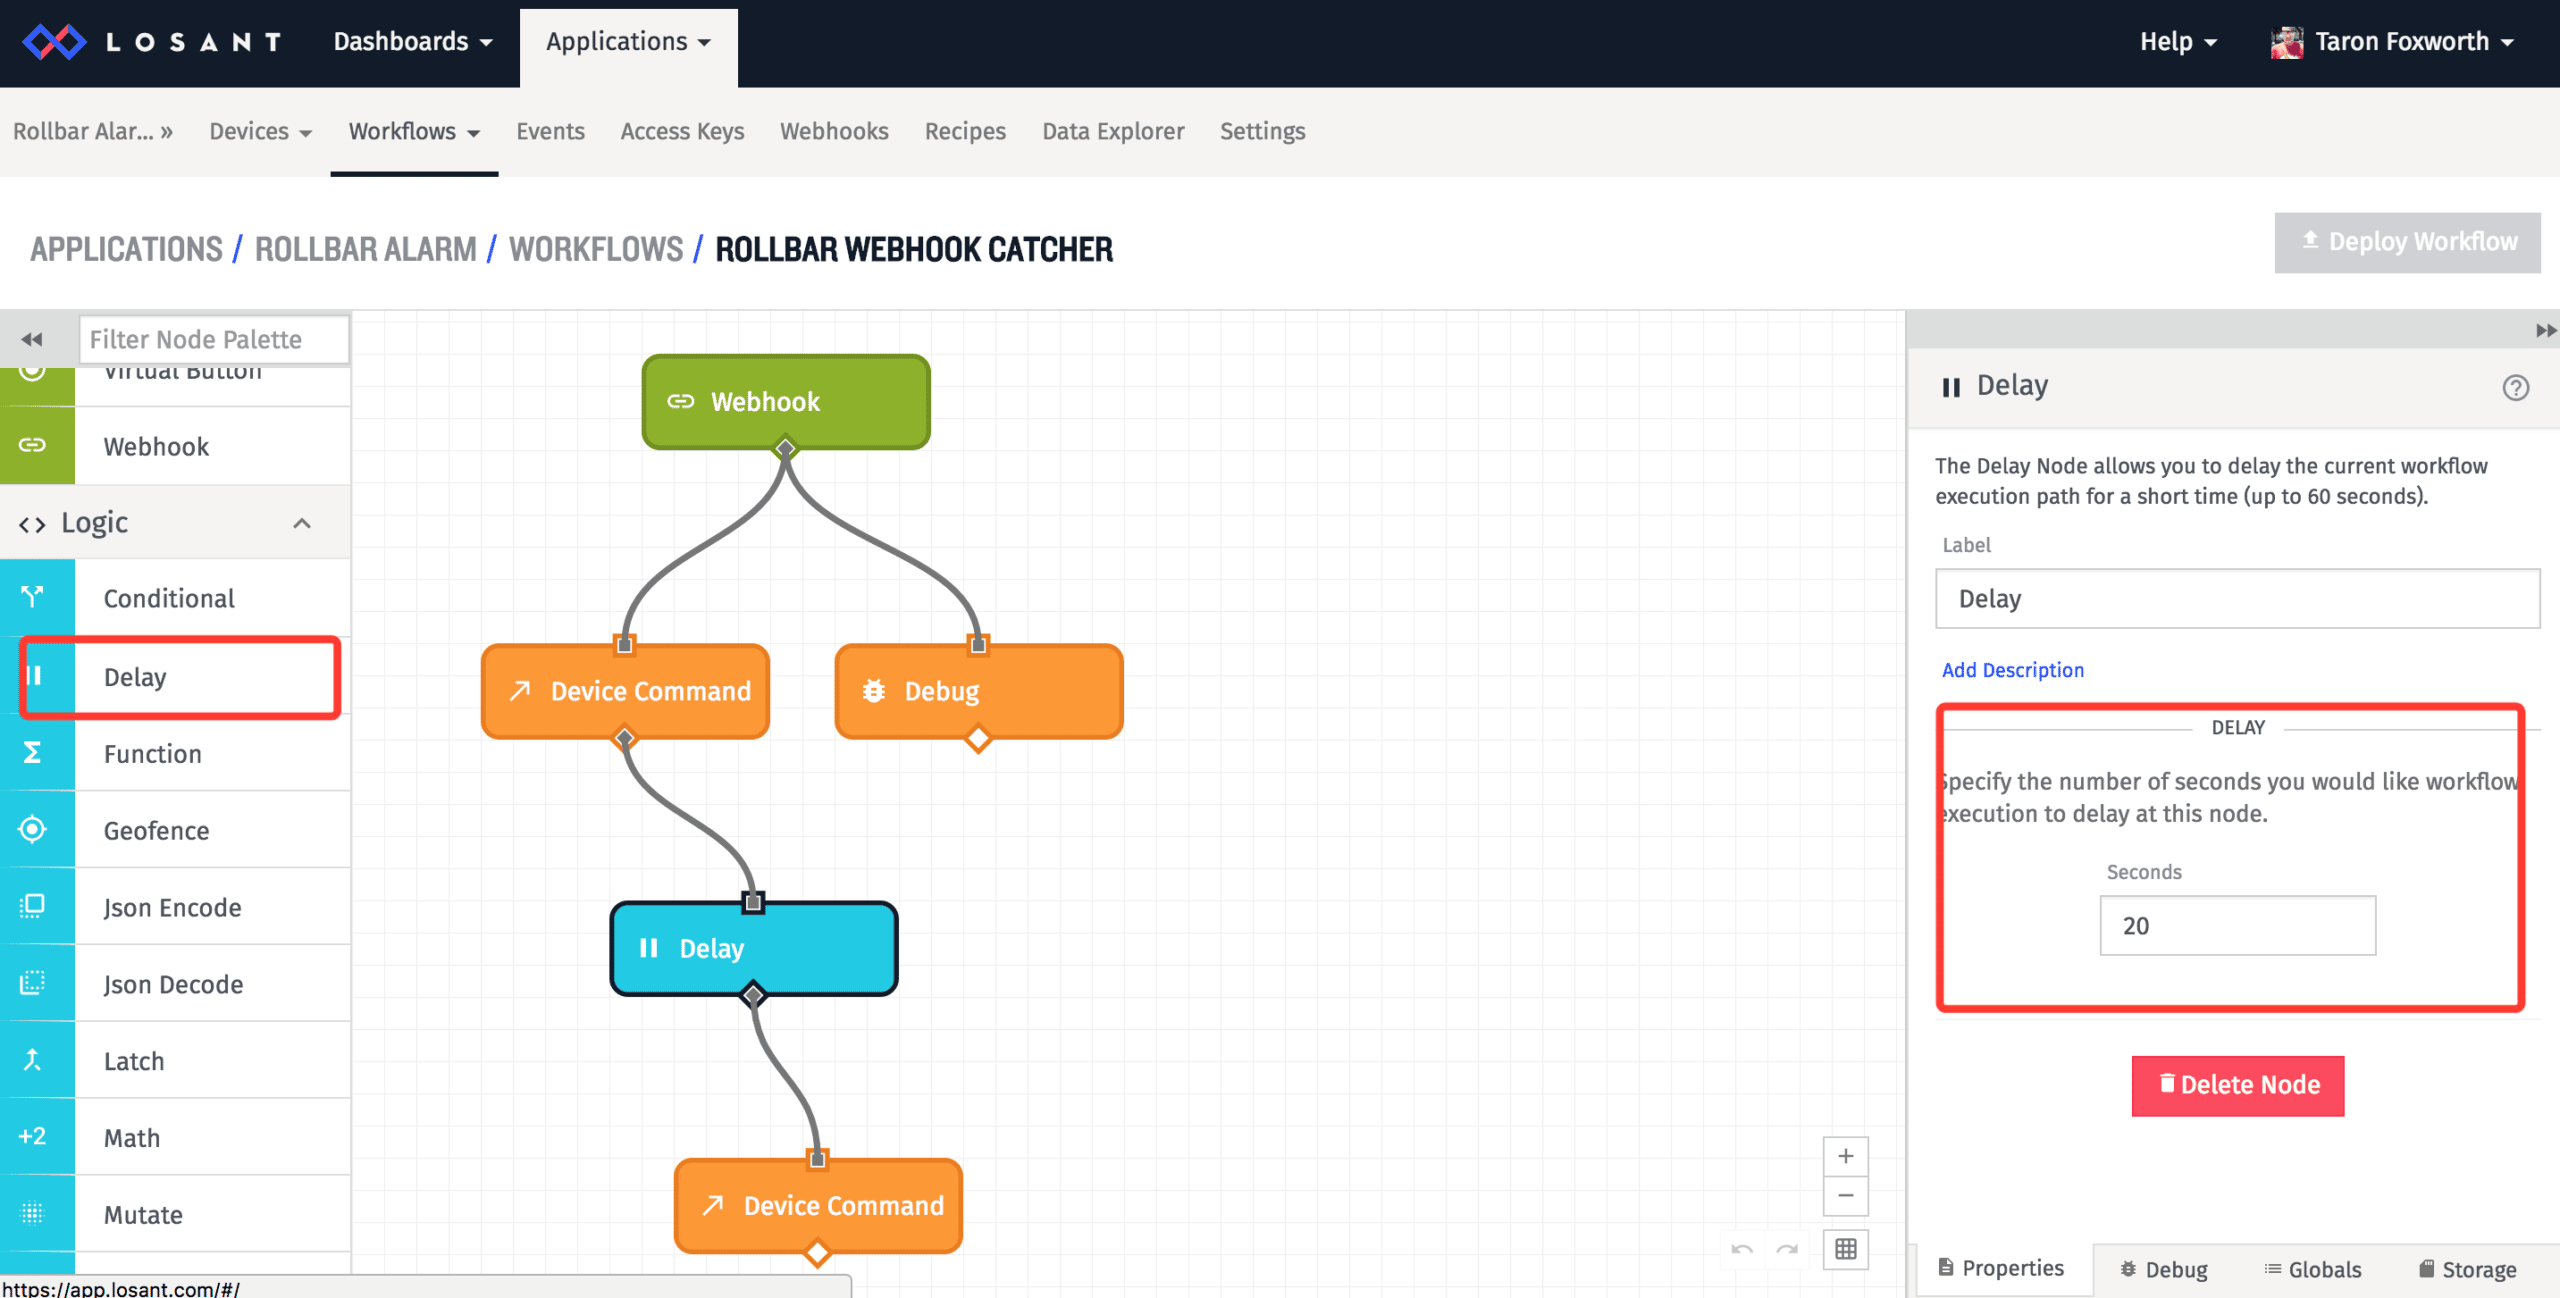
We do not want the alarm to continue forever; it could get annoying. So, twenty seconds is long enough for someone to see the warning and act upon it. To do this, we can use the delay node to pause the workflow for twenty seconds. Then, send a rollbar-wemo-switch command to the device with a state of 0 to turn the alarm off.
Testing the Light
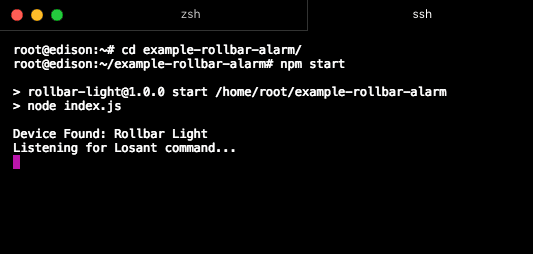
In your terminal, log into the Edison, go to the directory of your project and run:
npm startYou should see your device’s name. You can also use a process monitor, such as PM2, to keep the app running forever. Also, Intel has an IDE that makes it easy to deploy apps to the Edison.
In Rollbar, we can send a test notification. Once pressed, if everything worked, the workflow in Losant will trigger and your light will turn on for twenty seconds.
What's Next?
There is no limit to building a smart office, only your imagination. Here are some ways to extend this project:
- Attach a button to serve as an “ack” to turn off the button.
- Attach a speaker for a sounding alarm.
- Connect multiple lights to control each by a different Rollbar trigger.
To create and learn more, Losant has compiled a list of great tutorials and projects you can use for inspiration for more projects. Any feedback or questions? Let us know in the comments!
Thank you to Taron and the team at Losant for sharing this awesome tutorial and literally and physically 🙂 leading by example when it comes to being alerted to errors and exceptions. Bravo!
If you haven’t already, sign up for a 14-day free trial of Rollbar and let us help you take control of your application errors.